Software libraries

We use the 'module' engine to access available software packages.  

1.  Locally installed packages

To find and setup an environment for a particular software , do
  • to list available modules:
    module avail
    module keyword keyword
  • to load a module
    module load moduleName
  • to find a description of the moduleName module
    module help moduleName
  • to purge loaded modules (restore the defaul environment)
    module purge

To install a tagged version of specific package that is not listed please submit HelpDesk ticket.

2.  Personal installations 

We provide the /opt/meties/el8/ucontrib folder for personal installations.    
To build a test version from the source, follow the steps below (replace ProjectFolder, UserName,  PackageName, and ModuleName with actual names) :

  • create a build folder in your project area
    mkdir -p /lstr/sahara/ProjectFolder/build
  • download the package source into the /data1/ProjectFolder/build/PackageName
  • follow the build instructions from the package source documentation
  • use /opt/metis/el8/ucontrib/UserName/packageName as an installation target
    Example:
    cd /lstr/sahara/ProjectFolder/build/PackageName
    ./configure --prefix=/opt/metis/el8/ucontrib/UserName/packageName [build options]
    make all -j8; make install
  • create an environment module for the installed package in your home area
    mkdir -p /home/UserName/mymodulefiles; cd /home/UserName/mymodulefiles
  • create and edit packageName/moduleName
    touch packageName/moduleName
    nano packageName/moduleName
  • load packageName/moduleName in a shell or in a batch script to run the installed executables:
    module use /home/UserName/mymodulefiles;
    module purge; module load packageName/moduleName

3. Containers 

We support both podman and apptainer containers, in both interactive and batch modes. Batch jobs examples are available from
/home/examples/examples-metis/podman-apptainer

4. AI models

4.1 Ollama framework

Ollama is an open-source framework designed to run Large Language Models (LLMs) locally and privately on macOS, Windows, and Linux. The Metis hardware allows running large LLMs, such as 70B-class models (e.g., Llama 3 70B) in 4-bit quantization, or even larger models, with up to 192 GB VRAM consumption. The model list and documentation are available via the Ollama Model Library.

A dedicated AI server node, llm1, with two RTX6000 Pro GPU cards, each with 96 GB of RAM, has been added to the metis cluster. The server is dedicated to running AI models using the Ollama framework via interactive batch jobs and the WebUI interface. Additionally, all compute nodes can run smaller Ollama models at A100 Nvidia GPUs (40 GB VRAM).

4.2 Ollama environment modules

We provide two environment modules to set up Ollama.

  • module load ollama/ollama-llm1

The ollama-llm1 module enables access to the olama server running on the llm1 node equipped with several popular AI models, including llama3, qwen3, gpt-oss, phi4, deepseek, e.t.c. Use 'ollama list.' command to display the local list, and the https://ollama.com/search page to list models available at the ollama website. Any model from these lists can be used via the 'ollama run' command and will be stored in the /lstr/sahara/ollama/ollama directory. The disk space consumed is accounted for against the special "ollama" group account.

  • module load ollama/ollama-latest

This module provides an environment for a personal ollama server, which must be started via ollama serve&' command. The used models will be stored under the /lstr/saharaPrimaryGroup/ollama/UserName, and the consumed disk space is accounted against the user's primary group account (use 'id -gn' and 'id -un' commands at metis to find out your primary group and username).

4.3 Ollama interactive jobs

  • Regular compute node jobs

Ollama interactive jobs that use personal Ollama servers can be started on any regular compute nodes via the standard job submission procedure. For example, to reserve one GPU, 16 CPUs, and 128GB RAM on any of the cn01-cn32 nodes, one can use

  • qsub -I -l select=1:ngpus=1:ncpus=16:mem=128gb,walltime=02:00:00

followed by the

  • [user@cnXX ~]$ module load ollama/ollama-latest
  • [user@cnXX ~]$ ollama serve &
  • [user@cnXX ~]$ ollama list
  • [user@cnXX ~]$ ollama run model-name
  • Dedicated AI node jobs

These jobs assume the use of the ollama/ollama-llm1, and can be started as

  • qsub -I -q qllm -l select=1:ncpus=16:mem=128gb,walltime=02:00:00

followed by the

  • [user@cnXX ~]$ module load ollama/ollama-latest
  • [user@cnXX ~]$ ollama list
  • [user@cnXX ~]$ ollama run model-name

4.4 WebUI interface

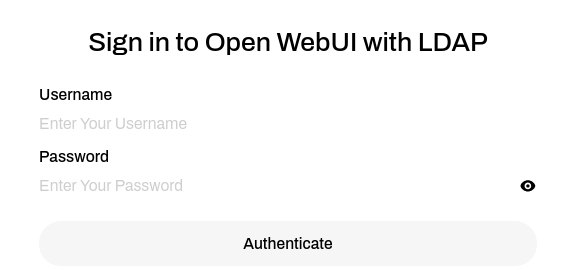
All active Metis users can use the Ollama Web interface at https://vmlab.niu.edu. NIU VPN is required for out-of-campus access. To access, sign in using the metis credentials:

WebUI login page

The site provides immediate access to the following popular models:

Additionally, any Ollama-compatible model can be added to the WebGUI upon request to crcdhelpdesk@niu.edu.


5. Python modules

We allow user-level installation of Python modules via pip3 and conda.

5.1  pip3 manager

  • A python package from the pip3 predefined repository will be placed in the user's home directory ~/.local/lib/python3.6/site-packages under user ownership. All dependencies will be checked/resolved:
    python3 -m pip install -U pip --user
    pip3 install pkgName  --user

  • Same as above but using the exact address for a package:
    python3 -m pip install -U pip --user
    pip3 install git+git://github.com/xxxx/pkgName.git

5.2  conda manager

Conda allows a more flexible way to manage personal Python packages, which is also more complex.
It is to be used as an extension of pip3  functions when special Python modules are required.
On Metis, conda is primarily required to install TensorFlow packages.

  • Create a new conda environment (confirm the installation of proposed packages). 
    For the example below, all packages will be stored under   ~/.conda/envs/p312tf:
    conda create --name p312tf python=3.12

  • List available conda environments:
    conda info --env
  • Activate an environment (do each time to use/modify p39test installation):
    conda activate p312tf
  • Install TensorFlow and dependent packages
    (p312tf) pip3 install --upgrade pip
    (p312tf)  pip3 install tensorflow[and-cuda] pandas matplotlib scikit-learn
  •  Run a custom code 
    (p312tf) python3 mycode.py

  •  To use the GPU version of TensorFlow, load the CUDA module first
    (p312tf) module purge; module load cuda/cuda-12.2
    (p312tf) python3 mycode.py

  •  Deactivate 'py312tf'
    (p312tf) conda deactivate

To use the Conda environment in a PBS batch script, add after the PBS directives:

source /etc/profile.d/conda.sh
conda activate p312tf
#Load CUDA module if needed
module purge; module load cuda/cuda-12.2
python3 mycode.py
conda deactivate

Batch jobs examples are available from
/home/examples/examples-metis/conda

5.3  Changing the default conda and pip3 cache and installation folders 

One can use the instructions below to move the conda and pip3 cache and libraries
out of the home area to a folder on the Lustre filesystem, for example,
/lstr/sahara/$(id -ng)/$USER

5.3.1 Changing the location of conda cache and libraries
  • Create a cache folder for all apps under  the project area:
    mkdir -p /lstr/sahara/$(id -ng)/$USER/appcache
  • Change the default conda folders (the default locations are under /home/$USER/.conda).To redefine, add to the ~/.bashrc
    export CONDA_PKGS_DIRS=/lstr/sahara/$(id -ng)/$USER/appcache/.conda/pkgs
    export CONDA_ENVS_DIRS=/lstr/sahara/$(id -ng)/$USER/appcache/.conda/envs
  •  To verify (from a new session) 
    [@metis ~]$ conda info | grep cacheall new environments and packages will work from the new locations.

All new environments and packages will work from the new locations. To free space in the home folder, you can delete the old conda environments (conda remove -n old-env) and reinstall them.

A good tutorial on the above from Iowa State University:
https://www.hpc.iastate.edu/guides/virtual-environments/conda-environments


5.3.2 Changing the default pip3 cache and libraries

The default cache and installation folder for pip3 are correspondingly /home/$USER/.cache/pip  and  /home/$USER/.local

  • To redefine pipe cache dir, add in  the ~/.bashrc
    export PIP_CACHE_DIR=/lstr/sahara/$(id -ng)/$USER/appcache/.pip3cache
  • To verify pip3 cache (logout and start a new login session)
    [@metis ~]$ pip3 cache dir

You can now remove /home/$USER/.cache/pip folder

5.3.3 Changing the default Python libraries

The default Python(s) installation folder is /home/$USER/.local

  •  to redefine, add to .bashrc
    export PYTHONUSERBASE=/lstr/sahara/$(id -ng)/$USER/appcache/.local
  • then from a new session,
    mv /home/$USER/.local/lib  /lstr/sahara/$(id -ng)/$USER/appcache/.local 

5.4  Jupyter Notebook on Metis or Gaea

    1. Install  Jupyter Notebook
      • [@metis ~]$ pip3 install jupyter
      • [@metis ~]$ pip3 install urllib3==1.26.6
    2. Launch the notebook using a random port number of your choice in the [10000,50000] interval  (12345 in the example below)
      • [@metis ~]$ jupyter notebook --no-browser --port=12345 --ip=0.0.0.0
        metis ~]$ jupyter notebook --no-browser --port=12345 --ip=0.0.0.0 
        [I 23:26:55.768 NotebookApp] Serving notebooks from local directory: /home/username
        [I 23:26:55.768 NotebookApp] Jupyter Notebook 6.4.10 is running at:
        [I 23:26:55.768 NotebookApp] http://metis:12345/?token=f7586e3b06bddb86f130f762860dfc4af4ce70223a8b8e77
        [I 23:26:55.769 NotebookApp]  or http://127.0.0.1:12345/?token=f7586e3b06bddb86f130f762860dfc4af4ce70223a8b8e77
        [I 23:26:55.769 NotebookApp] Use Control-C to stop this server and shut down all kernels (twice to skip confirmation).
        [C 23:26:55.790 NotebookApp]
        ......
        
        At the beginning of the above output, look for the URL to copy/past in your local browser in step 4; in this example, "http://127.0.0.1:12345/?token=f7586e3b06bddb86f130f762860dfc4af4ce70223a8b8e77"

    3. Open a terminal on your computer and create the SSH tunnel for the chosen port to the Jupyter Notebook server (the example below is for the Linux or MacOS environment; MS Windows users can follow these instructions):

      [@myComputer ~]$ ssh -f username@metis.niu.edu -L 12345:metis.niu.edu:12345 -N

    4. Open a browser on your local computer and copy/paste the access URL

    5. Detailed tutorial (including SSH tunnel setup using PuTTY): https://thedatafrog.com/en/articles/remote-jupyter-notebooks/


Prospective user?

Request an account.